Monday 15 August 2016

The Geometric rainbow granny square blanket


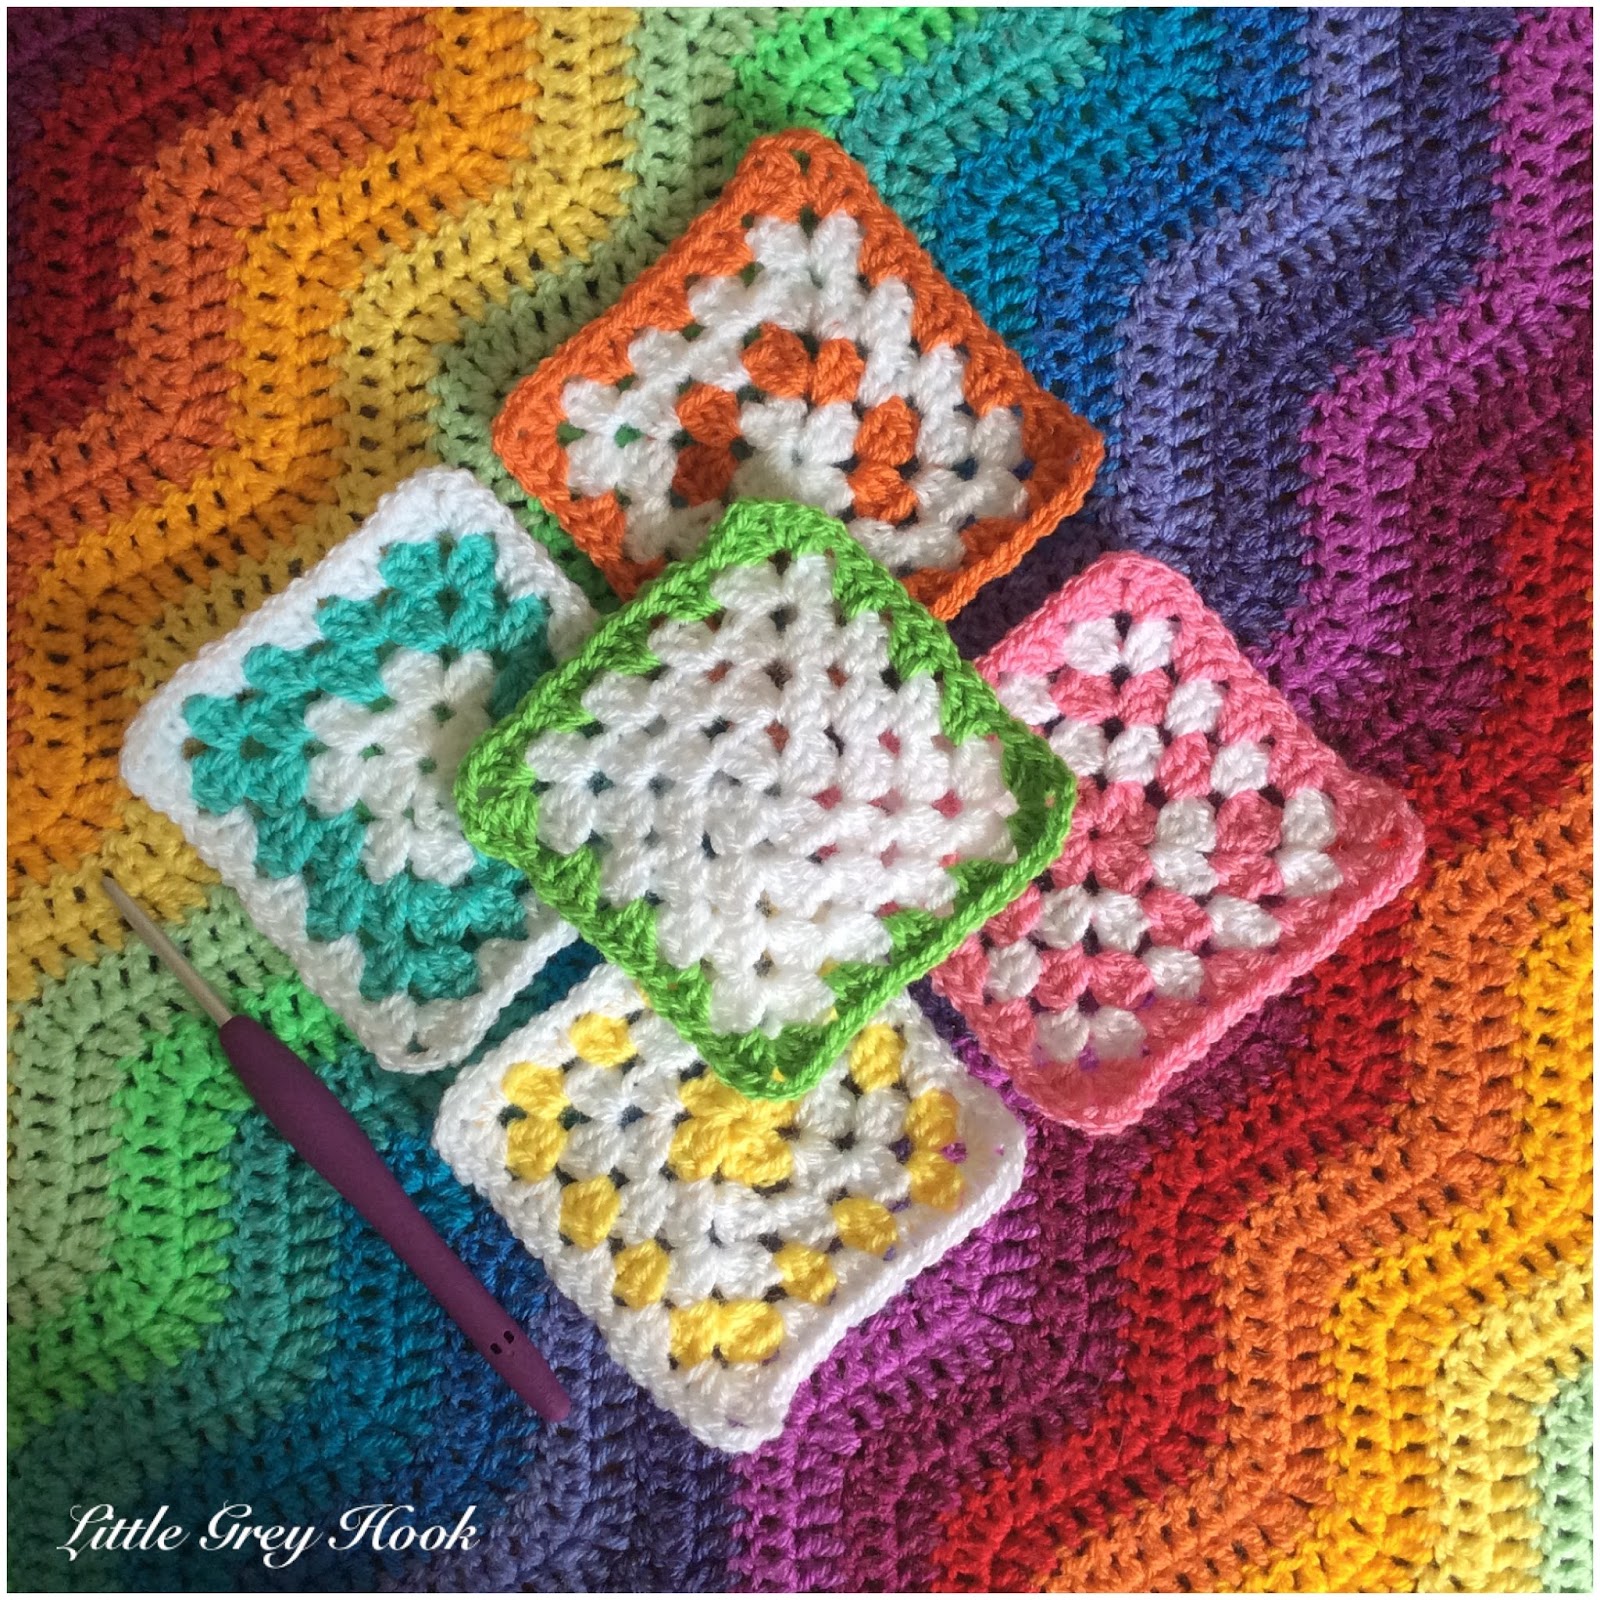
Inspiration comes from many places, and as I've mentioned previously, I use Pintrest and Instagram regularly to come up with new ideas. I had decided that I wanted to make something involving a rainbow colour scheme. This design was inspired by a cross stitch pattern, but my crocheters eye just saw granny squares!


The classic granny square is such a simple yet beautiful thing to make. It was the first pattern I mastered as a novice crocheter. I sat and happily produced square after pretty square for this project, enjoying the colours and ease of the task.


With such a lot of colour changes it was important to be very disciplined and I made sure to sew in the ends on each square before starting the next. Theres nothing worse than coming to the end of a project and having to spend hours with a darning needle. If its done as the squares are made it is a very quick task.

The piles in my basket grew steadily. There were 64 in total to make an 8 x 8 square blanket.


 It wasn't too long before they were all made and ready to join. I laid them all out in formation on my kitchen table so I could organise them into the correct order for joining.


I like to use the 'Continuous join as you go' method to join my squares, there is a good tutorial for it here by The Patchwork Heart. I joined the squares in white to really allow the colours to steal the show on this blanket.


Its a very quick method of joining and before long I was considering which border would finish it off nicely


I decided upon rows of half treble crochet (uk terms) in each colour in rainbow order. The blanket had reached a good size at this point and it took a while to complete each round


After a few hours of work I was finally onto the last round in red


I love how tight and neat this border looks, yet it was so simple to do while watching the children or tv.


Then it was finished! A quick wash and a spell on the line completed the project. The border did curl slightly, so I gave it a little steam treatment with the iron to get it laying flat and beautiful


These colours make me so happy! I love that the simple, classic granny square can be used in such a way to make a modern, bright and cheerful blanket. It just needs to find a new home now and is currently for sale in my Esty shop: Here

Thanks for stopping by

Berni x

Tuesday 9 August 2016

The Glitz Virus Shawl


Hello everyone

Another pattern that is constantly doing the rounds on Facebook, Pintrest and Instagram is the Virus Shawl. It is apparently called this because, like a virus, it is catching! It's actually a quite nice virus to catch and I thoroughly embraced the experience.

When I ordered my Ice yan for the 12 pointed star blanket (see below) I ordered another batch called 'Magic Glitz' in shades of turquoise.

This is another variegated/ self striping yarn, with a fine silver thread running through it to create a glittery effect. I chose this yarn with my Mother in Law in mind, as her birthday is in July and I knew this would make a lovely gift for her.

As with most of the patterns I choose to make, this one has a written pattern Here and a series of YouTube video's


The tutuorial was very easy to follow and I soon had the hang of it. Although it looks complicated, it only uses a couple of stitches and the pattern repeats every forth row, so it was quite easy to master quickly.

I chose to use my 5mm hook for this one, just to keep it nice and loose and allow the yarn to 'drape'
It's really quite nice to use this self-striping yarn too, as theres no colour changing involved and no ends to sew in. It worked up really fast and I was soon onto the border.


I decided to go with this one, in Stylecraft in Empire- a gorgeous dark turquoise that complimented the Ice Yarn beautifully.

Then it was done! Ta Da!

It's pictured here on my double bed, so you can see just how big it is. I completed 14 pattern repeats as I wanted to make sure it would have plenty of size to wrap around my Mother In Law's shoulders and keep her warm. This pattern can be done smaller to make a nice wrap around scarf too.


It made a wonderful gift and I'm so pleased with the finished result. It wont be the last one I make and I keep looking out for more suitable yarn for my next go. 

Thank you for stopping by
Berni x


Sunday 3 July 2016

The Ice Yarn 12 Pointed Star


Hello everyone
If you follow me regularly you will know I'm a Stylecraft girl. It was a recommended yarn when I first started to crochet and is used by a lot of the crochet artists that I follow myself and admire. It comes in 82 different shades, can be machine washed, tumble dried, is soft and perfect for almost every project. I have quite a stash of it now and there aren't too many colours I'm yet to collect.

But-

There is another yarn that has been tickling my fancy recently. Very similar in texture to Stylecraft, with the same care requirements for washing but it comes in so many beautiful variegated shades and I just had to try it! It's called Ice Yarn and it comes from Turkey- literally, it isn't stocked here in the UK. The problem with that of course is that I couldn't just pick up a ball from the local yarn shop to try it. So after drooling over photos of it being used for a variety of projects over on Pintrest and Instagram I bit the bullet and ordered some through Ebay. You should note that this yarn can be purchased from their website Ice Yarn but I found it was slightly cheaper and quite easy through Ebay.


The next decision was obviously what to make with this gorgeous squishy haul. I always have a little list of projects that I want to try written in my notebook, so after a quick look I decided upon a 12 pointed star- also known as a round ripple. I've never worked this pattern before, and found that there is a written pattern Here by Celeste Young and there is a YouTube video


This design was really easy to master and I was soon able to work it without referring to the pattern. The colours in this yarn are amazing! The bigger it got, the more beautiful it looked.


I actually struggled to put it down, and within just a couple of days it was almost finished.


Then it was time to add a border, I decided to keep it simple, with a row of double crochet and picot's on the top of every point. I originally chose cream for the border, but didn't like how it looked, so I went with Stylecraft in Fuchsia Purple 

Then it was time for a wash and I let it line dry. My blankets can be tumble dried on low, but I quite like to see them flapping about on the line having a stretch!


It was at this point I was going to list it for sale in my Etsy shop (after convincing myself not to keep it) but a friend had seen it on my Facebook page and messaged me to ask if she could buy it :)


This has been my fastest turnaround to date, from ball of yarn coming through the post to completed blanket on it way to it's new home in less than a week!


I'm already planning my next one as I really did enjoy making it so much. They make perfect baby blanket's, play mats and even adult lap blankets. I can make to order if you would like one of these lovely's in your life.

See you again soon

Berni x


Friday 17 June 2016

The Bobble Stitch Blanket


Hello everyone

I seem to have been absent from my blog of late and I apologise for that. I've spent too much time with a hook in my hand and not enough time in front of the laptop. It's not that I haven't been online, if you follow my Facebook page or my Instagram account you will know that I try and update them most days, it's just that they are easy to access from my phone or Ipad in those snatched minutes waiting for kicking out time at preschool or while the kids are splashing about in the bath. Blog writing involves waiting for some alone time, plugging in the laptop and thinking about what to write!
But anyway, I came on here this morning to tell you about the Bobble Stitch Blanket. This was a commissioned piece by a lovely lady I know through our shared love of Ragdoll cats. She contacted me after seeing a similar blanket on eBay and asked if I could create one for her. At this point I had never used the required stitch to create a 'bobble' so I looked up a pattern and got to work. Within an hour I had produced a heart shape from bobbles in a sample square and was confident I could produce a blanket from them.
We agreed on colours and design and I set to work. The blanket was to be made up of nine patchwork style squares. Five of them were to have hearts, the other four crosses. She had asked for muted blues, greys, plum and lavender, so I came up with Grey, Silver, Denim, Lavender, Wisteria and Grape.


I love how pretty and neat these squares look, and they didn't take long to produce


Before long I had them all done and was ready to join. I used grey for the joining as I felt it gave the squares a nice border. We agreed on the positions of each square and I used a simple double crochet join to attach them together.


Then it was time for a border. I chose to complete a round of each colour in double crochet, finished by a round of shells and picot's in grape.


It was then washed and dried and given a quick block with my steam iron to leave it looking flat and neat.


Ta Da! All done! This was a pleasure to make and I thoroughly enjoyed trying something new. I love the softness of the colours and the lovely texture that the bobbles creates. It was then shipped off to it's new home and I received some lovely feedback.


This handsome chap is Remi who is very pleased to have a soft warm blanket to lay on, it's just unfortunate as it wasn't supposed to be for him! I have heard of some crocheters being very offended to find their hard work and dedication to the task has been 'claimed' by a cat or dog, but I was thrilled to see I had made another Ragdoll happy, as my own fluffy spoilt fur-children all have my blankets to lay on too.

So for now I must dash as the smallest one will wake from her nap any minute, but I will be back soon as I have some more completed projects to write about.

Take care and thanks for stopping by

Berni


Saturday 28 May 2016

The Fluffy Meringue Blanket


Everyday my crochet bucket list grows bigger. I see so many wonderful and inspiring pictures while browsing the internet. There are just so many patterns to choose from, and they're everywhere I look on Facebook, Pintrest, Instagram, and Blogs. I actually keep a list of things I need to make, of patterns I want to try and this one rocketed straight to the top of the list.


I came across it on a Facebook page called Pink Lime Crafts. Sharon is a very talented crochet artist and she had made this blanket in a stunning rainbow colour scheme, You can see it on her blog here. I was blown away by how gorgeous this blanket looks and knew I had to try it. I'm still learning pattern reading and this one should have put me off from the start -


Luckily there is a YouTube video! This made life much easier, but it also taught me how to read the chart.


As much as I loved Sharon's colour scheme for this blanket I wanted to be original and decided a girly mix of peach, pink and lilac would look beautiful. I dug into my colour pegs and came up with Soft Peach, Apricot, Candyfloss, Pale Rose and Wisteria. The 'dusky' pastels really appealed to me and I couldn't wait to get started.


It worked up quite quickly in the beginning, each colour has four rounds of pattern which are repeated until the desired size is achieved.


The tutorial is really quite easy to follow provided you have a good grasp of the basic stitches. The difficulty as always is knowing where to put those stitches and a couple of the rounds are a little bit more tricky because of this. The 'back post treble crochet two together' became a dreaded but necessary stitch!


As it got bigger, each round inevitably took longer and longer to complete. The most labour intensive being the picot's or 'ruffles' that stand up from the rest of the blanket. When I got to that round I would have to make sure I was settled with a cuppa and something good on the tv. It was not a round to try and do while the children were demanding attention or in-between checking the dinner!


Finally after 12 'rounds' I decided it was a nice size for a baby blanket. I have to admit I did put this down a few times to work on other things, it was quite a labour of love, but I really wanted to see it finished and this kept me going.


To finish it off I added one of my labels, put it through the wash and tumble dried it on low. The picot ruffles refused to lay flat for me to photograph so I gave it a bit of steam treatment with the iron. This is called 'blocking' and the number one rule is to never let the iron touch the yarn. Instead you must hover above and let the steam do the work. This gave it a lovely final touch and allowed the pattern of stitches to shine.


This is the first blanket I have made that doesn't actually have an owner. I decided a few months back that it was time to open a shop on Etsy. So this is my first item of stock. At the time of writing this it is for sale and available to purchase, but hopefully this wont be for long.


As well as making blankets to sell in my shop I am also taking orders, so if theres something you would like, please send me a message.

Thanks for reading, see you again soon.

Berni x